5 favorite non-toxic skincare products boosting my wellness +fertility

Non-toxic + clean skincare products I’m using to boost my wellness & support my infertility journey

Over the last 3 months, I’ve done a complete overhaul of my life to create a toxic-free space in hopes of bettering our chances at conceiving our double rainbow baby and just living a life that promotes health and vitality, instead of taking away from it. I've changed what's on my plate, and I’m eating about 90% plant based, so I knew it was time to change what I was putting on my skin, the most absorbent organ in my body.
Most recently, I cleaned out my bathroom and I was so surprised to learn how many things I was using that was not only hurting my chances of getting pregnant but that was just plain filled with bad things in general. Some of the biggest culprits were my lotions, my cleaner [isn’t that supposed to remove the bad stuff] and my candles! I’ve always been a sucker for clean packaging and I realized that’s not the best way to choose what products you put into your skin.

non toxic skincare products for fertility.JPG

After going to the infertility doctor and having him basically tell me I'm too old to have children without the help of IVF, I started researching all the things. I was determined to prove him wrong, because even though I'm about to be 40, I don't feel like there is something wrong with me, I feel healthy. I know from once going Vegan, I can heal with the power of food, and I was ready to change whatever i needed to in order to get this body ready for our rainbow baby. I started making adjusts to my whole life to get what I want. Said goodbye to pizza [dairy + carbs], eliminated all the caffeine and bad-for-me drinks, and started saying 'no' more often, and embarked on an oils journey in an effort to ease my stress. While all of this was effective at calming my mind and body internally, what was I doing externally to support this infertility journey I am on?

infertility books to read for non toxic living.JPG

I started reading all the books about fertility and my thyroid condition and quickly learned, many people have successfully had children after the age of 40, and after having many miscarriages. I also learned that there is very little regulation for the skincare and beauty industries and companies are allowed to use carcinogens, hormone disruptors, neurotoxins in many of the products I was putting on my body through my skin. I realized that many of these toxic products I was using every day to "look younger" may have just been negatively affecting my ability to get pregnant and to carry a baby past 12weeks. For those of you new around here, Jason and I, have two angel babies up in heaven and we have been working on getting pregnant with our double rainbow baby for almost 14 months now.

I knew after reading the book, It starts with the Egg, which had an entire chapter on facts as to how these things can harm your eggs, that my skincare routine was having a direct effect on my reproductive system. And I learned that most of the products I was using had these in them.

Non-toxic + clean skincare products I’m using to boost my wellness & support my infertility journey.JPG

I have so much to share that I have learned, and I want to tell you all about what's working for me now after I basically did a full toxic overhaul in my home and with my body. I'm talking all about my skincare routine now, and what products have really made a difference.

These are 5 of my favorite non-toxic, all natural skin care brands I'm using to support my infertility journey and to live a more toxic life.

clean non toxic skincare products.JPG

The first thing I needed to think about was how I was washing and preparing my face in the morning and at night. I was using a cleanser at night, a toner, and a nightly face lotion. In the morning, I was washing it with the same cleanser, using an exfoliator pad [with all the chemicals], and then applying a serum, then a skin cream, an eye serum, eye wrinkle cream, a toner, a lotion, and I think that's it. I think back about my old routine now and can't help but think about all the chemicals I was applying daily with the products that were supposed to be cleansing my skin all before I even applied any of the harmful makeup I was so used to using my whole life.

I knew that as I made these non-toxic changes, I wanted to find brands to really understood my aging and toxic filled skin. I wanted products that had ZERO sulfates, SLES, SLS, parabens, formaldehyde, phthalates, mineral oils, oxybenzone, coal tar, hydroquinone, triclosan, and triclocarban in it. But I also wanted a product that worked and that also HAD things in it that would help fix my skin issues. Basically, I wanted a product that gave me results for my skin issues but didn't give me all the harsh side effects of most of the products I was using.

tumeric minimal clean living image.JPG

Priori : Naturally clean Adaptive Skincare

When I found priori, the first thing I looked for was to make sure that it didn’t have any of those harmful ingredients I was trying to avoid but I also wanted to know that it wasn’t going to take 85 different products to fix my sun spots, fine lines and imperfections. Priori is an adaptive line that uses science and the right ingredients to create something that responds to your individual environment, nutrition and genetic needs. The new TTC line that I have been using, has shown me results. They feature a highly potent compound of 3 kinds of colorless turmeric root, plus green tea, grape seed and licorice to create a product that helps with brightening, anti-inflammatory and antioxidant.

I’ve been using the cleanser and nothing I have ever used has left my skin feeling so soft. It doesn’t dry out the skin, and leaves it feeling hydrated. At morning and night I apply the skin restore creme, which is going to work on my fine lines and inflammation. And then every other night I apply the Illumination treatment before bed. This is designed specifically to reduce the appearance of uneven skin tones, and adapts to my specific skin type to brighten and illuminate my discolored skin areas.

priori TTC tumeric based non toxic skincare.JPG
priori clean tumeric based skincare.JPG
priori skincare non toxic turmeric based facewash.JPG

Primally Pure: Non-toxic deodorant and skin care

One of the first things I changed about my beauty routine was my deodorant. It’s one of the most used products in my bathroom because I may forget to wash my face or apply lotion on some days, but I never forget my deodorant. I read so many stories about all the scientific theories about how deodorants are related to breast cancer and it scared me. But, honestly, I couldn’t find a natural deodorant that worked! Until Primally Pure. Seriously obsessed with this company and love all their products. I now use their dry shampoo (smells heavenly and works amazingly!) and their geranium complexion face spray for my afternoon refresh. Dying to get in on their body butters and flower bath salts next!

Click here and use code HEIDI10 for 10% off your purchase and don’t tell anyone because it’s not out yet but starting black friday thru Thanksgiving weekend, you get 15% off ! [shhh, secret}.

LRG_DSC01366.JPG

Young Living Essential Oils

I recently had a friend reach out to me and tell me that she thinks I should use essential oils. I, like most of you reading this, thought nope, not gonna be part of that pyramid scheme. I politely declined and then she mentioned that maybe I should just try this one drink, that was known to aid in infertility. Clearly, that consumed me and I caved, I bought the starter kit one month ago and I haven't looked back.

We use the oils everyday, from wellness + immunity roller blends to get us over this cold and flu season, to a few drops of lemon on our dryer balls, to diffusers to make the house smell like the holidays instead of toxic candles burning all day.

I'm working on a blog post called, "my first month as a crazy oil lady," that will include all the ways I used my oils and grew to appreciate the way they contribute to our fertility journey and healthy non-toxic home but for now, I'll just put my favorite radiating face serum blend right here for you: It's a game changer.

M A M A G L O W F A C E S E R U M:

using oils from the starter kit ONLY, combine in 2oz amber bottle and fill with jojoba oil

  • 15 drops frankincense [promotes healthy growing skin, good for breakouts]

  • 15 drops copaiba [driver oil which increases other oils when combined]

  • 10 drops lavender [improves mood and decreases feelings of sadness]

    [for an extra punch of goodness, add this-not in starter kit but you need it]

  • 20 drops blue tansy

I just add a drop to my Priori illumination creme and it's heaven in a drop.

essential oil flatlay.JPG
radiant face serum with essential oils.JPG

Herbivore Botanicals: Body essentials for self care

One of the main things everyone talks about when infertility comes up is stress. The pressure that comes along with infertility, miscarriages and trying to conceive is, immense, to say the least. It is so hard to turn the brain off. I try my best to find some alone time that I allow myself to think about the process, the good and the bad of it. I find that if I carve out specific moments to cry, dream, hope, or just be sad about the fact that we can't get pregnant it helps me to sleep better or to move on with my day. I take at least 5 minutes a day, ALONE, to think about my journey. Sometimes it's in bed, sometimes I sit in the car alone after Jason and Finn have gone inside, but one of my favorite ways to reflect and accept what's happening is a long quiet bath filled with herbivore botanicals goodness.

This coconut milk bath soak is moisturizing and softens my skin plus it smells delicious.

herbivore coconut milk bath.JPG

Dr.Bronners Toothpaste

Much like my deodorant, toothpaste is something I literally wanted to change immediately. I have tried SOOO many toothpaste brands and when I finally stumbled on the fact that Dr.Bronners had toothpaste, not just soap, I was in. It doesn't leave that gritty feel after you brush and it has natural ingredients that really do leave you with fresh breath! I love Dr. Bronners toothpaste but I love their mission even more; We’re fighting for a marketplace where consumers are not misled and where organic standards are applied to body care just as they are to food. YES!

IMG_0686.JPG
Do the best you can until you know better. Then when you know better, do better.” —Maya Angelou.

I leave you with this quote by women goddess Maya Angelou and I challenge you to make some changes in your home and take out some of the toxic things that may be harmful to you, your family and your children. If you're struggling with fertility, it can be a lonely place and I understand. I love this community I have found through social media, and I will continue to share my journey with all of you in hopes that someone reads this and feels a little less alone. Please feel free to reach out if you want to discuss anything further with me, I'm here and I'm an open book!

non toxic beauty routine.JPG
non toxic skin care pinterest graphic.jpg

Meet the Blogger - 20 Questions about yours truly

Meet the Blogger - 20 questions about me

Last year, I actually worked with a brand to be a guest on their blog and it happened to be right during our pumpkin patch outing at the same time! It's so fun to look back each year and read about what season I was in, in my life, so why not make this an annual thing and do the hard thing, like talk about myself once a year.

If you wanna read last years, it's called, It's All About Me.

Why keep you in suspense, here we go!

tanaka farms pumpkin patchJPG

Do you have any nicknames?

My name is Heidi and my middle name is Jo, but most people who know me, call me Heidi Jo. Jo Jo has always been a name i've been called and when I was really little my aunt used to call me Josephine, just to tease me, because she knew I hated it.

Where did you grow up and what kind of activities did you do in high school?

This just made me lol because the first thought that came to mind was the time we all almost got arrested for the senior prank, but then I remembered, I was also my class president, so I swear I was a good kid.

When you were little what did you wanna be when you grew up?

I was 100% certain I was going to be a psychologist. I loved talking to people and hearing their issues always made me feel better about mine.

tanaka farms pumpkin patch mom style.JPG
tanaka farms pumpkin patch tractor rides.JPG
tanaka farms pumpkin patch dilf dad style.JPG

what is your worst habit?

DO I have to say? I bite my nails. It's the worst, I wish my mom would of put some sort of cream of something on my hands when I was little that tasted terrible because it's a horrible, gross habit IMO.

What age did you start working and what was your first job?

I can't remember if it was Blockbuster Video or if it was one of those lotion carts at the mall. I was 16 and I had no car, but somehow I got to work on time every day after school. Ps, millennials, there was no such things as uber back then. Do you guys even know what Blockbuster video is [crap, I'm old].

tanaka farms pumpkin patch wheelbarrow.JPG
tanaka farms pumpkin patch candid mom style.JPG
tanaka farms pumpkin patch.JPG

5 things you are currently crushing on right now.

  1. Zara, for all the kids clothes, like all of them.

  2. Below Deck- guilty late night pleasure

  3. Essential Oils- I just got on the Young Living train and I can't even sleep because I'm so excited about how I'm going to be healthy AF real soon.

  4. Southern California weather + sunsets- cause I mean come on people, it's Nov 2 and the sun is shining and it's 81 degrees outside!

  5. Vegan Meals- I know, everyone isn't a fan but I'm working my tooshie off trying to make that rainbow baby, and I know my body is thanking me every time I pick up that kale salad.

What's the biggest project on your to-do list right now?

PERSONALLY:

Making that rainbow baby- acupuncture once a week, gave up caffeine and carbs, and I'm adding in essential oils to create a non-toxic, healthy space for myself and hopefully a growing baby soon.

BUSINESS:

I really really really want to try and update my blog, I want to organize it and really get it dialed in but I'm a self-taught blogger and it takes me forever to research how to do the tiniest thing. If any of you reading this know about square space and wanna help a sista out, send me smoke signal, please!

What's something you wish you could do one more time?

I don't know if I can type this without loosing it. But, I just want to hear my best friends voice again. I lost her 3 months ago yesterday, and every single day without her gets harder and harder. If you want to know more about that, visit mydailymoments.

tanaka farms pumpkin patch.JPG
tanaka farms pumpkin patch dad mini meJPG
tanaka farms pumpkin patch2.JPG
tanaka farms pumpkin patch.JPG

Have you traveled out of the country and if so, to where?

Oh boy, yes. I want to say lots, but there are still so many other places I want to go visit so; after college, I went on a trip to London, Rome, Paris and Amsterdam. [little-known fact]: My boyfriend at the time was Jim, who is now the owner of Cleobella [IG acct full of travel heaven], and he was an avid surfer who traveled all the time. I had never been out of the country and he basically forced me to go and explore the world. Even though I couldn't pay my rent when I got home, it was probably the single best decision of my life. [so, thanks Jim!] . Then when I was working in the fashion biz, I worked with a brand from Barcelona and Jason and I ended up taking a little work/pleasure trip to Barcelona, Prague and Berlin.

Are you a light packer or take everything you own kinda gal?

bahaha, definitely lean towards the everything I own kinda gal, but, if I'm going somewhere like Palm Springs or Hawaii, it's easy because I just bring bathing suits and cover-ups.

tanaka farms pumpkin patch.JPG
tanaka farms pumpkin patch.jpg

Who are your favorite Instagram accounts?

Well, after 3 years I have created quite the community of beautiful women to surround myself with. These are just a few of them.

@simpleandseason

@jenhawkins

@almostmakesperfect

@mikobowen

@freshexchange

@thelovedesignedlife

@chrissyjpowers

@steph.pollock

@senaenelson

@hellojessiemartin

And I also love a few bigger "business-y" accounts like,

@em_henderson

@plantphilosophy

@wellandgoodeats

@goop

tanaka farms pumpkin patch.JPG

Name 3 things you eat every day + 3 you'll never be caught eating.

Celery [juice it every morning], French fries [totally Finn's fault], and onions. I think Onions are pretty much the answer to any good meal.

AND, peas, no way will you ever catch me eating a pea, I don't eat red meat and I haven't in the last 7 years, and sadly, I have to answer cheese [wah wah wah] trying to cut that our for my fertility diet.

What type of music do you listen to and what's your fav song to play on repeat?

I used to listen to everything, with the exception of country [only when my friends play it around me] and now I pretty much live on either alternative radio or Disney movie soundtracks. Animal by Miike Snow is my favorite song I never get tired of.

What's your favorite saying that people hear you repeat over and over?

Come on, bro. The other day we were driving and this car cut us off, out of the backseat, clear as day...Finn yells, "COME ON, BRO!" Dead.

tanaka farms pumpkin patch.JPG

Thanks for following along! It’s not easy to talk about yourself, I get it, but now it’s your turn!

If you are reading this, consider yourself tagged.  Answer one question below and the rest on your website, if you’re a blogger!  If you aren’t a blogger, answer away in the comments!  I love to learn more about you.

How I create a consistent aesthetic in my photos

If you haven’t already read my basic photography tips to create a curated style, it’s best to start here.

IMG_0413.JPG

How I edit my photos and the apps I use to create a consistent aesthetic in my Instagram feed

Favorite Apps

I usually end up using between 1-4 apps from start to finish when editing my photos before posting on the gram. I feel like I have tried them ALL, and finally found the ones that work the best and are quick and easy! Some of my favorites are Lightroom [free], snapseed [free], retouch [free] and unfold [for my stories] and VSCO [free].

photo editing apps.PNG

VSCO

After using VSCO forever, which totally worked to start with, I switched to Lightroom and I don’t think i’m ever looking back. VSCO has some really great one click filters you can apply and it’s a great place to start for beginners! Favorite filters are A6, M5, and I used G6 for a long time. You have the ability to copy and paste the same filter to multiple images at the same time, so this always helped plan a consistent style and easily edit blog posts that had multiple images. I still adjusted all the things even after I applied a filter so, you can use the same tips I’m sharing below from lightroom, in VSCO. Start by adjusting the strength of the filter and then focus in on the exposure, white balance [temperature], and HSL [color saturation and hue].

BEFORE

BEFORE

EDITED WITH VSCO A6 FILTER

EDITED WITH VSCO A6 FILTER

EDITED WITH MANDI NELSON PRESET IN LIGHTROOM

EDITED WITH MANDI NELSON PRESET IN LIGHTROOM

Even though VSCO’s filters are basically free [some you pay for] and presets can sometimes get pricey [anywhere from $30-$120 for bundles] I switched to Lightroom because I liked the professional preset options better, as it adjusted more things for me ahead of time. With VSCO I would spend so much time perfecting the tweaks because their filters just didn’t work on all my photos and sometimes a I just couldn’t find the right adjustments to make it consistent with my feed. Lightroom has presets made by professional photographers and I found they made more changes built into the preset that made it really easy to get a consistent and professional look to all my images no matter where or when they were taken. One thing I do like better about VSCO is you can edit the strength of the filter as a whole, vs in Lightroom you can’t adjust the intensity of the preset.

BEFORE

BEFORE

EDITED WITH VSCO A6 FILTER

EDITED WITH VSCO A6 FILTER

EDITED WITH MANDI NELSON PRESET IN LIGHTROOM

EDITED WITH MANDI NELSON PRESET IN LIGHTROOM

LIGHTROOM + PRESETS:

After 3 years and countless apps and filters, I found the easiest way to get a consistent style from all my images is to apply a preset in the Lightroom photo editing app. They have a mobile version or a desktop. I have both, but to be honest, I find myself using the mobile version 90% of the time, and it’s free!

I went through so many Instagram accounts to find the presets that worked best for me. I like a natural look with crisp, cooler feel with a hint of orange, less yellow and muted greens. If that makes no sense to you, don't worry, just find someone you like and try it out. You can give any preset your own stamp by adjusting things like the exposure, tint, temperature and color hues and saturation [skin tone]. It took me about two months to really start to understand what changes when I adjust what, but now I really think I’ve got it down!

BEFORE

BEFORE

EDITED WITH VSCO A6 FILTER

EDITED WITH VSCO A6 FILTER

EDITED WITH MANDI NELSON PRESET IN LIGHTROOM

EDITED WITH MANDI NELSON PRESET IN LIGHTROOM

Current Preset:

Mandi Nelson

I love how crisp and cool her's are-but I adjust the oranges and yellows quite a bit. [I'll show you how I use hers in a later in this post]. You should also go to her story highlights on her IG there’s a crazy amount of good tips on there and she reviews tons of FAQ’s about lightroom + how to use presets. Here’s just one example of how you can really have your own style, even when using a preset. Mandi’s feed vs my feed using the same lightroom preset still look very different because of our photography style and editing.

IMG_5040.jpg

Previous preset:

Jessica Janae

These are what I used for my first 3 or 4 installments of #thedailymoments and about 3 weeks on my Instagram feed.

Steph Pollock suggested her and uses her presets beautifully. You can see below the difference between my style and Stephs. It just shows you how diverse a preset can be and that by using a preset someone else uses, doesn’t always mean your images will look exactly like theirs. It’s all in how you shoot, the lighting, editing angles and how you adjust the presets.

Steph pollock IG feed.png
occasionally_perfect photo editing tips.PNG

Other Presets I love:

Jenna Kutcher

Jenna is a beautiful soul, excellent photographer and someone I adore! Her presets are perfect for the beginner because she gives you a ton of easy one click options that don’t need a lot of adjustments.

JennaKutcher presets IG Feed.PNG
JENNA KUTCHER PRESET EDITING TIPSJPG
EDITED WITH JENNA KUTCHER PRESETS

EDITED WITH JENNA KUTCHER PRESETS

Bethany M Poteet

Her presets make me feel like i’m sitting on a white sandy beach. Such a pretty and calm vibe.

IMG_4901.PNG
BEFORE

BEFORE

EDITED WITH BETHANY POTEET PRESET

EDITED WITH BETHANY POTEET PRESET

EmmyLowe x BurtsBriPlease

I mean, don’t you just want your whole house to look this crisp, clean and happy?

burtsbrispleasepresets.PNG

Sophia Elrae

If you want a moody or warmer fall vibes, love this mamas presets.

sophiaelraepresets.PNG
BEFORE EDITS

BEFORE EDITS

EDITED WITH SOPHIA ELRAE PRESETS - COOLSAGE

EDITED WITH SOPHIA ELRAE PRESETS - COOLSAGE

Adjustments to presets [lightroom] or filters [vsco]:

The first thing I do to my photos is apply my preset and then I adjust from there. I focus on 3 things, exposure [brightness], temperature [warm or cooler] and color saturation [skin color and landscape vibrancy]. I also adjust the sharpness or grain if the image needs it but not always, this is already done in my preset, so it’s one less step to edit.

First edit, add preset

First edit, add preset

Then adjust exposure + shadows +highlights

Then adjust exposure + shadows +highlights

Go into Color tab, and top right is the MIX where you can change each color individually.

Go into Color tab, and top right is the MIX where you can change each color individually.

I typically change the yellow to get rid of artifical light and then orange to adjust skin tones.

I typically change the yellow to get rid of artifical light and then orange to adjust skin tones.

Exposure

I almost always [ok, always] adjust the exposure. I try and take all my photos underexposed or not in direct sunlight so that I can adjust the brightness myself once it’s in the app. I adjust exposure right after I apply the preset and then also after I do ALL my other edits to the preset. I sometimes need to go back and lower it if it’s too bright and lost some contrast or brighten it if it is still too dark.

IMG_4438 copy.jpg
IMG_4446.JPG

Temperature

This can help take a blan photo to a whole new level, adds yellows and oranges [warmer] or blues and greens for a cooler feel. I don’t adjust this much anymore, I use the Color Mix to really change each color. But, it’s a good place to start before you get crazy learning the adjustments to specific colors.

Color Hue + Saturation [skin tone]

Thanks to @hellojessiemartin [she’s the best account to follow for really good photo editing tips] I learned all about this part of Lightroom and it’s really upped my photo editing game.

3 colors I focus on adjusting in my photos are the yellows, oranges and greens. Start with the color MIX tab.

yellow: Taking the yellow saturation down, gets rid of that horrible artificial light in most homes and restaurants and makes your images more white + natural [like they should be]. Practice this one with a bathroom shot. It’s amazing what taking the yellow saturation can do to your photo! If you take the luminance up, it makes them even more white and bright.

IMG_0613 2.JPG
IMG_0613.JPG

orange: this adjusts skin tones, this one you have to play with because it everyone has such different skin, it’s really up to you to see what works best for you. Use the color mix tab and adjust the saturation first, then hue to adjust the yellow, orange and red undertones in your skin. Mandi’s preset already takes down the oranges, so I usually bring them up a bit from where she has them.

IMG_4986.JPG
IMG_5020.JPG

green: this is mainly for my outdoor shots or images at home that have my plant babies in them. I take the greens down a little so that it doesn’t stand out in my photos. Grassy parks or front yards can get a warm touch to them if you take the green out of the photo a bit.

IMG_3406 2.JPG
IMG_3406.JPG

How I edit in lightroom mobile [step by step]

Here’s an example of an edit from start to finish. I snapped a quick photo of Finn on my iPhone X on a cloudy day. The lights weren’t on in the house and the front door was giving off some light behind him. Let me walk you through my steps in Lightroom.

IPHONE SNAP ON CLOUDY DAY -BEFORE EDITS

IPHONE SNAP ON CLOUDY DAY -BEFORE EDITS

EDITED WITH MANDI NELSON - MINIMAL PRESET + ADJUSTMENTS

EDITED WITH MANDI NELSON - MINIMAL PRESET + ADJUSTMENTS

STEP BY STEP

Import photo into Lightroom mobile

  1. Scroll the bottom all the way to the right - add PRESET [I click through each of my options to preview as some pictures look better with different presets to start with, but usually end up with EVERYDAY by MANDI NELSON].

    *Depending on what preset you use these next steps may not apply to you. My preset already ups the shadows and takes down some colors, so you can use my screenshots as reference where they are.

    [use the 3rd slide as an example- I took the oranges up to +24].

  2. Scroll to the LIGHT tab - up the exposure quite a bit, Don’t worry if the skin tones look white here, you will adjust the colors MIX tab later and this will help fix that washed out look on the skin. Sometimes I take down the shadows too.

  3. Scroll to the COLOR tab - on the top right, you’ll see MIX, that takes you into the colors so you can adjust individually. ORANGES - fix skin tone. Start with the SATURATION and then go to the hue until you find the tone you like.

  4. Still in the MIX tab - click YELLOW. Adjust the saturation until you get the walls or whites in your photo the way you like them.

  5. EFFECTS tab- personal preference but I like less grain in my photos, so I take that down a bit on MANDI’s preset.

  6. To finish - go back to LIGHT tab, and adjust your EXPOSURE again to make sure you don’t loose contrast when brightening too much.

THAT’s IT!

That’s how I edit my photos in lightroom using the MANDI NELSON preset, EVERYDAY.

ADD TO LIGHTROOM, CHOOSE PRESET TO APPLY

ADD TO LIGHTROOM, CHOOSE PRESET TO APPLY

EDIT LIGHT - UP EXPOSURE +TAKE DOWN SHADOWS [IF NEEDED]

EDIT LIGHT - UP EXPOSURE +

TAKE DOWN SHADOWS [IF NEEDED]

COLOR TAB - MIX [TOP RIGHT CORNER] ADJUST ORANGES [SKINTONES]

COLOR TAB - MIX [TOP RIGHT CORNER] ADJUST ORANGES [SKINTONES]

ADJUST YELLOWS - TAKE THE SATURATION WAY DOWN TO FIX ARTIFICIAL LIGHT

ADJUST YELLOWS - TAKE THE SATURATION WAY DOWN TO FIX ARTIFICIAL LIGHT

ADJUST THE GRAIN. THIS IS TOTALLY A PERSONAL PREFERENCE BUT I LIKE LESS GRAIN.

ADJUST THE GRAIN. THIS IS TOTALLY A PERSONAL PREFERENCE BUT I LIKE LESS GRAIN.

GO BACK AND ADJUST EXPOSURE AGAIN IF NEEDED

GO BACK AND ADJUST EXPOSURE AGAIN IF NEEDED

OTHER PHOTO APPS I LOVE

SNAPSEED -

Oh how do I love this app so much!

Snapseed not only can adjust the colors of your photos, but it can adjust parts of your photos, it can auto correct your perspective and it can even EXPAND your image if you didn’t take those two steps back before snapping like I suggested. I’ll work on a tutorial of how I use them next because I actually use this one a lit to change the angle, and perspective of my pictures.

RETOUCH -

The best healing app out there. When I say healing, I mean get rid of that lady on the beach standing behind the perfect capture of your little one, removing the tv wires from a photo or the telephone wires from a super cute shot of the family. This app is super easy and makes it easy to get rid of all the little things you don’t want in a picture.

UNFOLD -

Unfold is the app that takes your IG stories to a whole new level. Picture collages never looked so good! You can add fonts, background frames and even upload videos and images on the same slide.

I hope this helps! I have so much more I’ve learned over the last two years, so maybe I’ll make this photography tips thing a more regular occurrence. If you have a specific question you want answered, feel free to comment below! Can’t wait to hear if this was helpful or not.

photography tips i've learned to create a curated style

the best photography tips i've learned for capturing your family perfectly, even on your iPhone.

BA350A9B-81E2-4048-AF44-33CD575E7316.JPG

If you're a mom trying to just get great photos of your family that you can frame, or if your an aspiring blogger who wants a curated and personal aesthetic consistently throughout your feed, these are some simple tips I've learned over the last few years that helped me do just that.

If you’re looking for step by step examples of how I edit my actual photos right now. Head over to this post. I walk you through everything step by step and show you how I use all my favorite apps.

Three things I focus on to keep my Instagram feed cohesive:

1. shooting [lighting + angles]

2. editing [presets, touch ups, and angles]

3. posting [9 grid]

90% of my photos I take on my iPhone X, and 50% of the time I use the portrait mode, it needs bright natural light to be crisp, so sometimes I can't use it to get the best shot. If I am using an actual camera, I'm usually using a Canon t3 that Jason bought for me 8 years ago. But truthfully, in my opinion, it's usually not the camera that makes the picture look good, it's the person taking it. It took me almost 3 years to finally feel like I kinda know what I'm doing at these are a few things I've learned that have helped me.

ikea duktig kids play kitchen hack.JPG

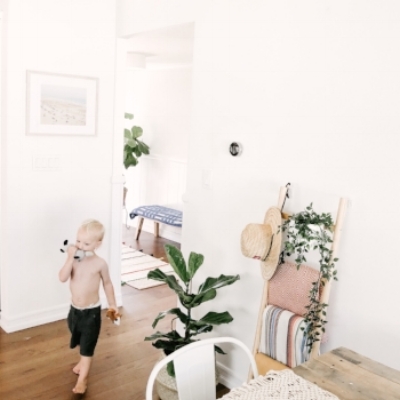
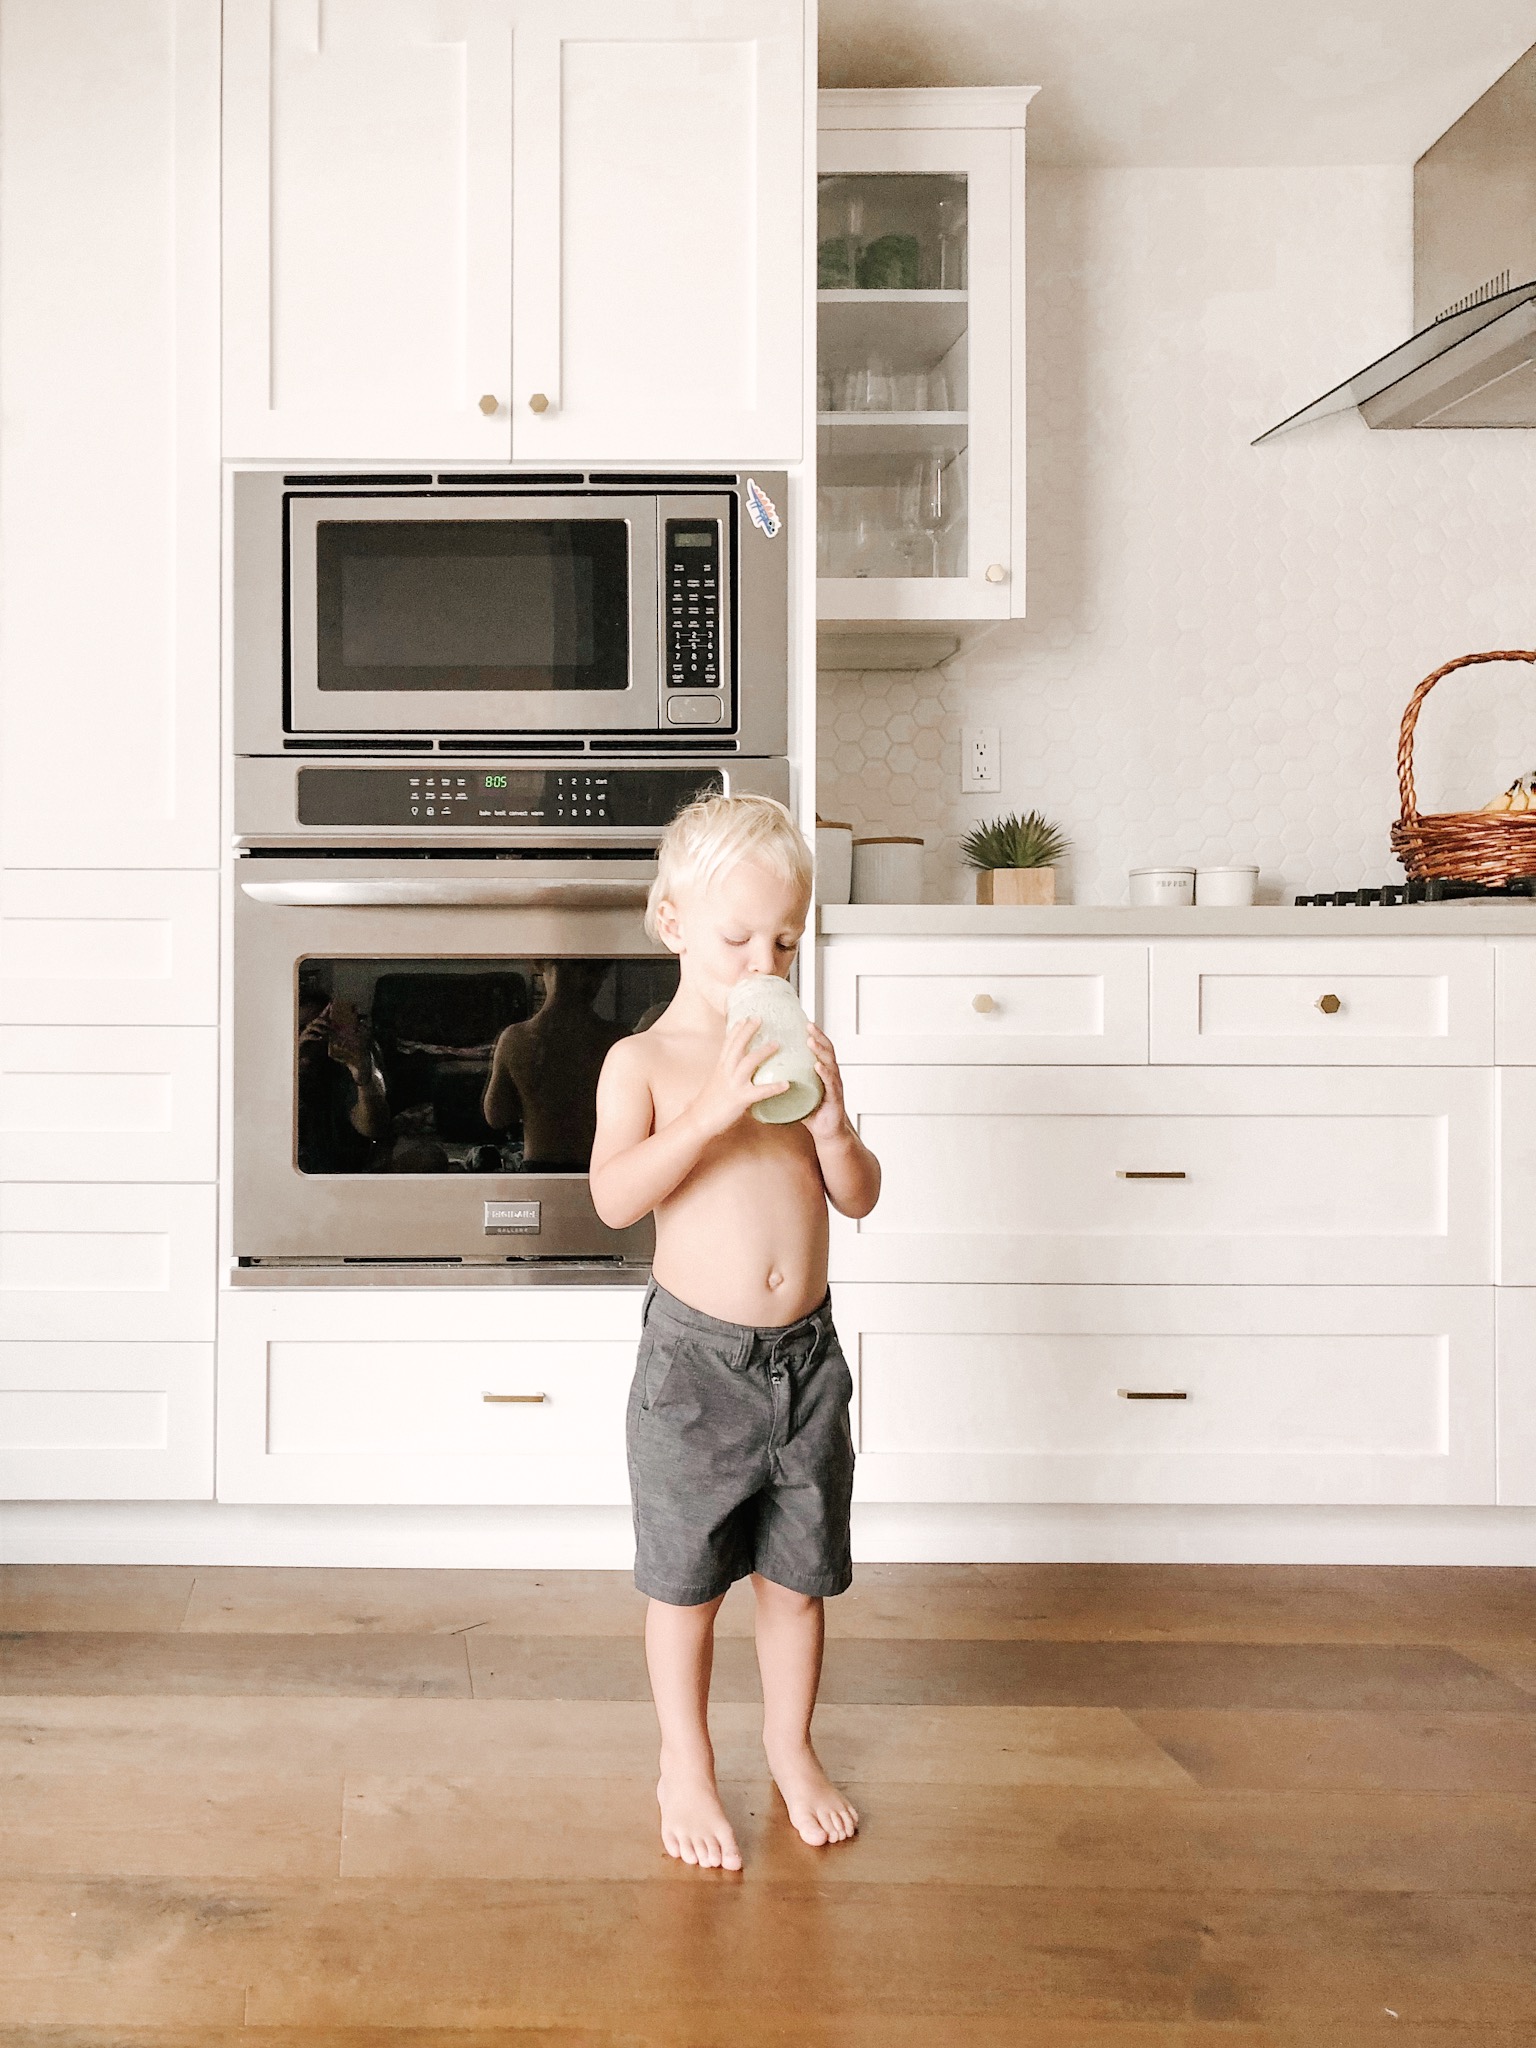
1. When shooting anything; people, food, scenery, selfies, be aware of your surroundings and don’t be afraid to take a few steps back and get more of the location in the picture. [you can always crop later]. A good rule of thumb I use when directing Jason to take a photo is to make sure you get our feet and our heads. It’s human nature to always want to take the image close to someone’s face but I like it when you get the whole picture of what’s happening in the image when you take it from farther away.

modern bohemian home large letter print.JPG

2. I almost always try and take my photos with natural light. If I’m outside, whoever is taking the picture [usually me] have them [or you] stand with your back to the sun. And try and avoid standing in the sunlight. Use a shaded area that still gets a good amount of natural light from the sun.

3. If you are shooting indoors, or with artificial lighting, you can get rid of the yellow tints by adjusting the yellow hues and the temperature of the image. [Lightroom does this best]. This is my favorite things I've learned so far. But when shooting, try and keep the lights off as much as possible and avoid using the flash. It’s easier to brighten the photo because it’s dark vs get rid of the yellow light or reflections from the glare of lights.

photography tips removing yellow artificial light.JPG
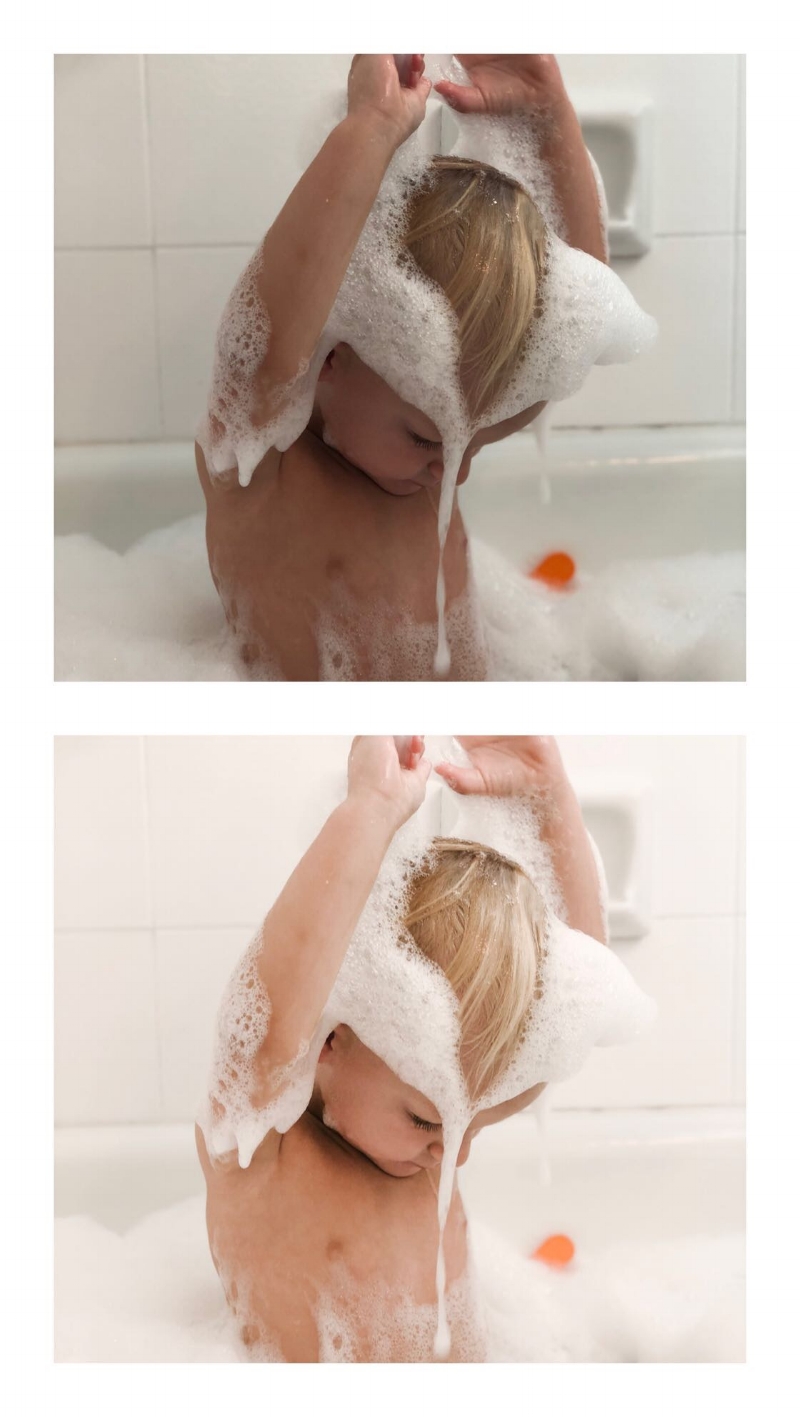
toddler bubble bath photo tips for moms.JPG
photo tips for moms.JPG

4. When you edit, keep your photos straight and centered. Use the crop/straighten tools and the perspective to adjust the angle vertically or horizontally. I will show you how to do this in SNAPSEED in this post, but you can use any app or just adjust them in your photo gallery in your phone. This helps with the rule of 3’s, by keeping your lines straight.

photography tips for moms.JPG
photography tips for moms2.JPG

5. Use the rule of 3's in photography to align the photo. This is so simple but makes the biggest impact. The rule of thirds is applied by aligning a subject with the guidelines. The basic principle behind the rule of thirds is to imagine breaking an image down into thirds (both horizontally and vertically) so that you have 9 parts and creating a horizon so that your eye easily moves from square to square.

IMG_4870.JPG

6. Set your scene first and make sure you’re taking the snap straight if you can. If you have time take a couple practice shots so you can see if a weird outlet or random thing stands out in the image. Try and take photos straight on so when you align your subject, don’t shoot from the side of it, shoot straight at it. Don’t be afraid to move around! Taking images from all angles you wouldn't normally think would be good, sometimes get you the best shot! If you end up with something in the image you want to edit, I use RETOUCH. Like this picture below actually had a vacuum leaning on the sliding glass door. I edited it out with two clicks.

IMG_2551.JPG

7. Use your favorite preset or filter to keep all your photos consistent. Lightroom mobile is free and it is a professional photo editing app that usually you can editing in one click using purchased presets. Below are 6 images shot in very different settings and light but edited with the same filter. I’ll put some of my favorite presets in my post, How I create a consistent aesthetic in my photos. [other apps I use and love, snapseed, color story, and retouch].

IMG_1623.JPG
IMG_4475.JPG
IMG_3406.JPG
IMG_4662.JPG
IMG_3048.JPG
IMG_0039.JPG

8. This one is more for influencers or bloggers, but I use a planning app for my posts. I use planoly, it’s not a free one... but I’ve used it forever and I love it. I usually only post once a day but sometimes I get multiple images that day that I want to post so I save them in there. I store my hashtags and write and edit my captions ahead of time. This helps me see if a photo's colors or how I edited to fit into my aesthetic or if I need to adjust the exposure or temperature to fit the rest of the images before I actually post it.

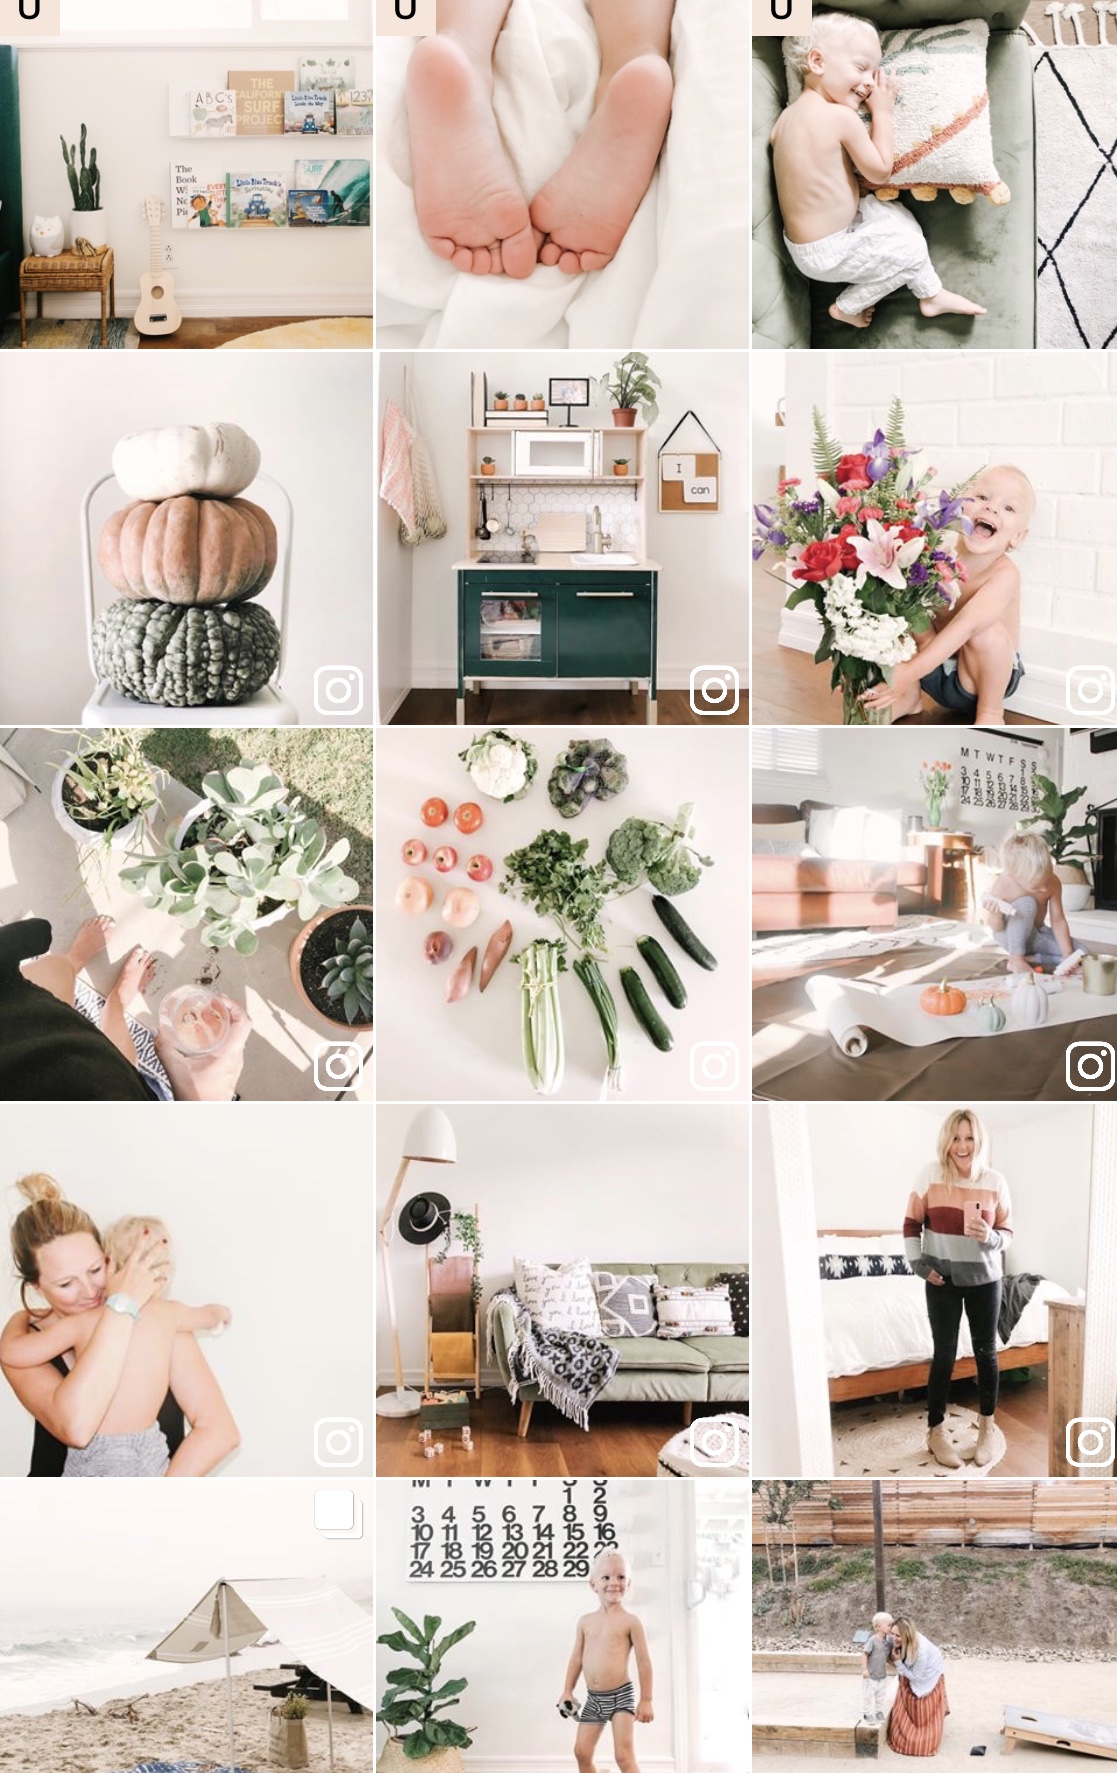
9. This is a personal preference but I use the grid method [maybe it’s called something different] but I staged my photos to have one light and one darker photo each time. Which creates a grid that is easy on the eye.

photography tips for mommy blogger planoly.jpg

10. Try, try and try again. The more you shoot, the better you will get. Same with editing. As you start to edit your photos, it will become second nature and then you'll learn another trick to making your photos the exact style and feel you are looking for.